Last Lesson
Recently, we learned the basics of navigating, troubleshooting, and dimensioning in inventor. Now, we can start examining how to build and then edit 3D shapes based on multiview sketches.
Evaluation
For this lesson, you will be evaluated based on:
- The quality of your notes in your notebook based on the video, as measured by a quiz.
- The quality and detail in your Hands Up Pair Up sharing session.
- The quality of the directions, coaching and support you give in Rally Coach.
- Your ability to use the Extrude Tools in Inventor to create specific 3D shapes, as measured by a formative RWE and a final unit RWE.
Watch Mr. Stevenson Do It
The following demo uses the algorithm below to guide the process in converting a multiview sketch into a 3D object in Inventor.

We Do It
Now, we will work through the same process as a team. The demos below show building the shape from the side view (lower left in the diagram), then from the top view (upper left in the diagram) then from the front view (lower right in the diagram.)
- Watch the demo video as a team for the side view.
- Use the algorithm to build the shape and extrude it.
- Repeat for the top view, then for the front view.
Side View
Top View
Front View
You Do It Together
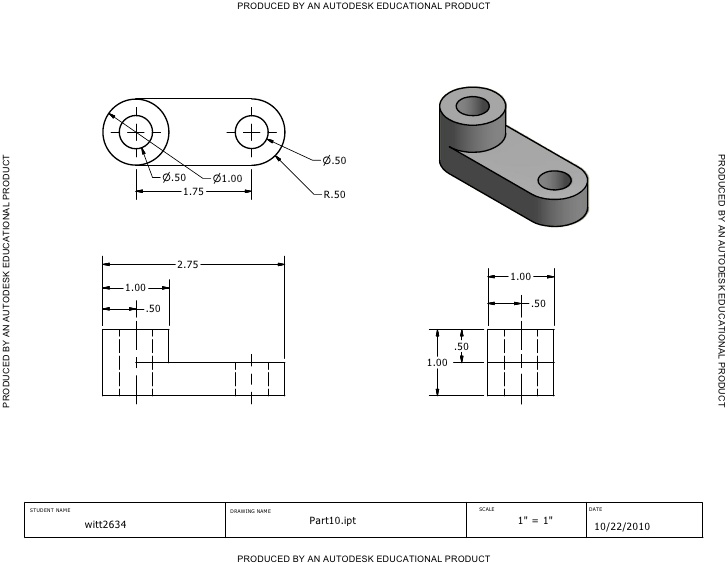
With your shoulder partner, you will now recreate the 3D shape below using the multiview sketch. As a team, follow the algorithm to:
- Determine which view to create as your initial 2D sketch.
- Create your first dimensioned line, as well as all subsequent lines.
- Extrude your 2D shape in direction 2.
- Make the original sketch visible.
- Extrude any remaining parts of the original sketch as joins or cuts.
- Create any necessary additional sketches, and extrude them as joins or cuts.
You Do It Alone
Move on to the individual practice page.