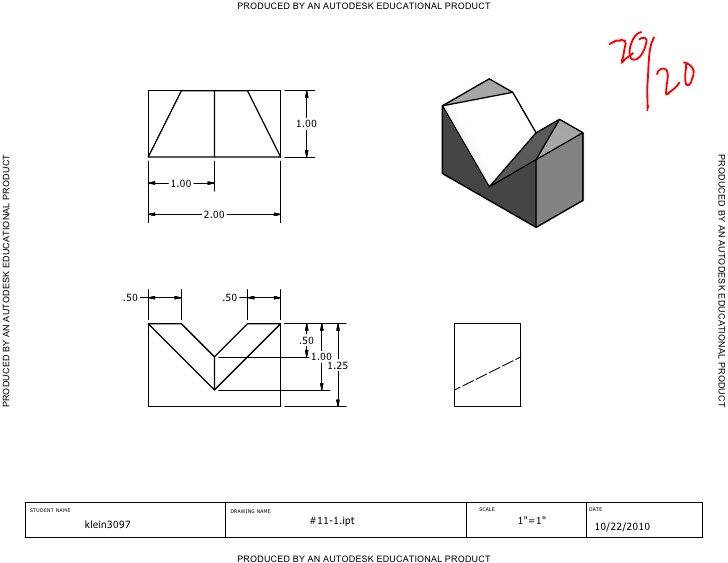
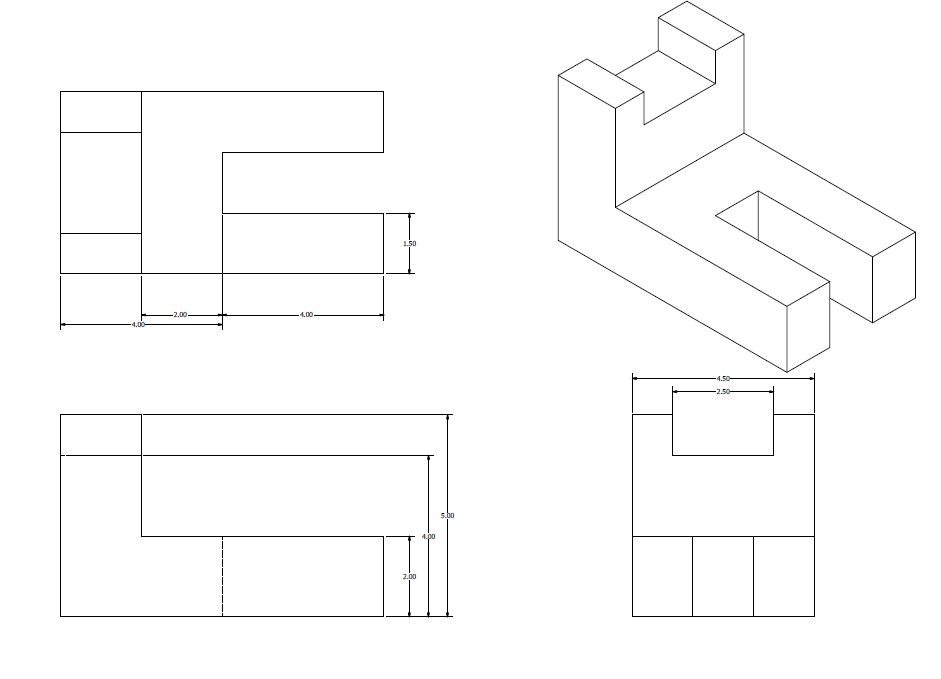
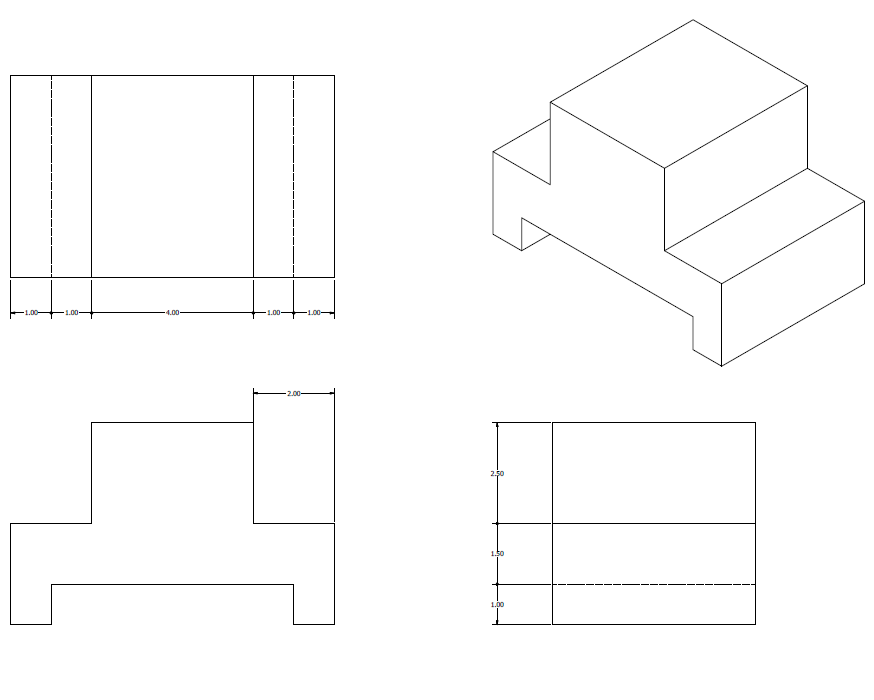
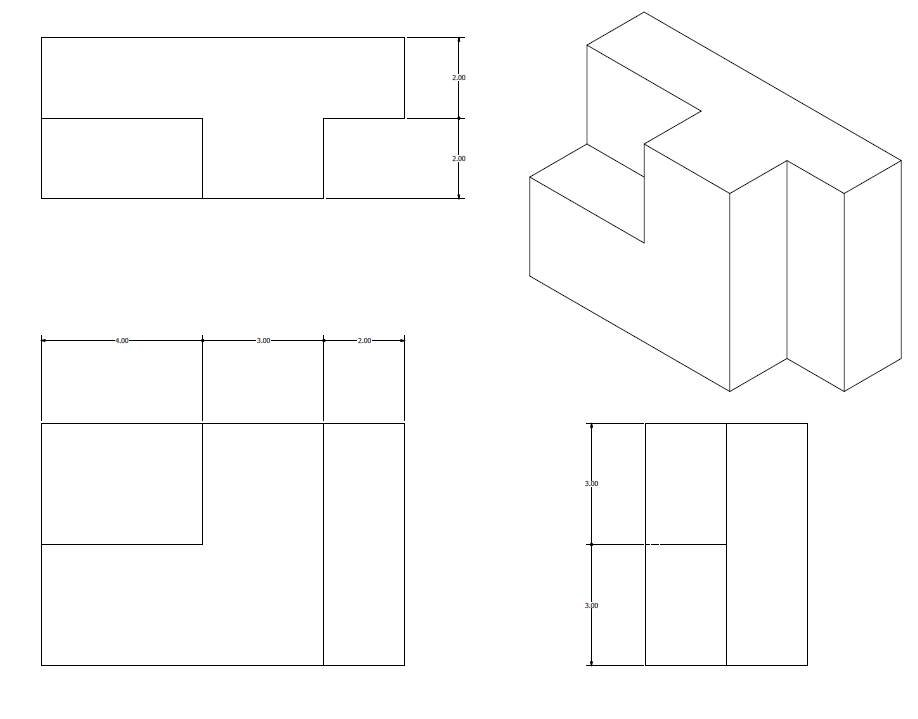
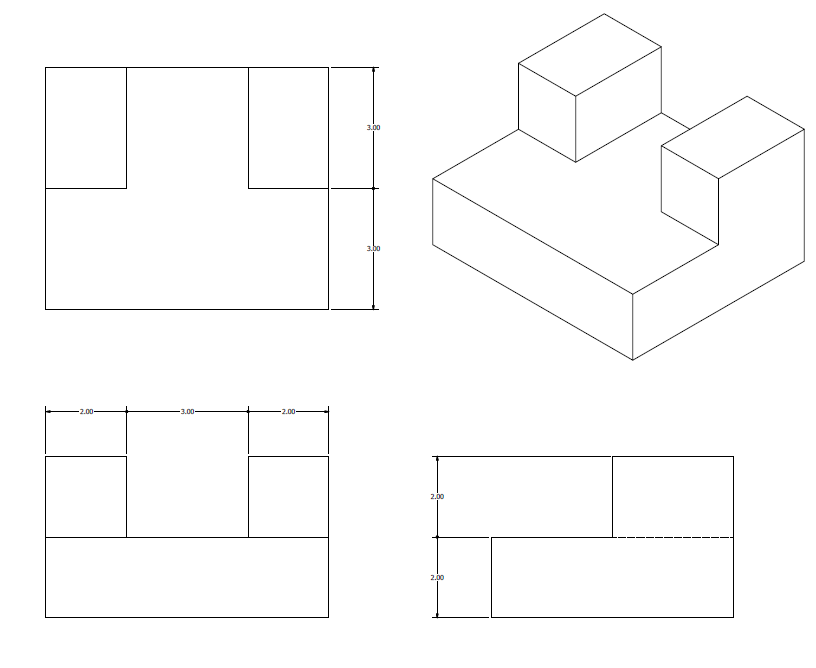
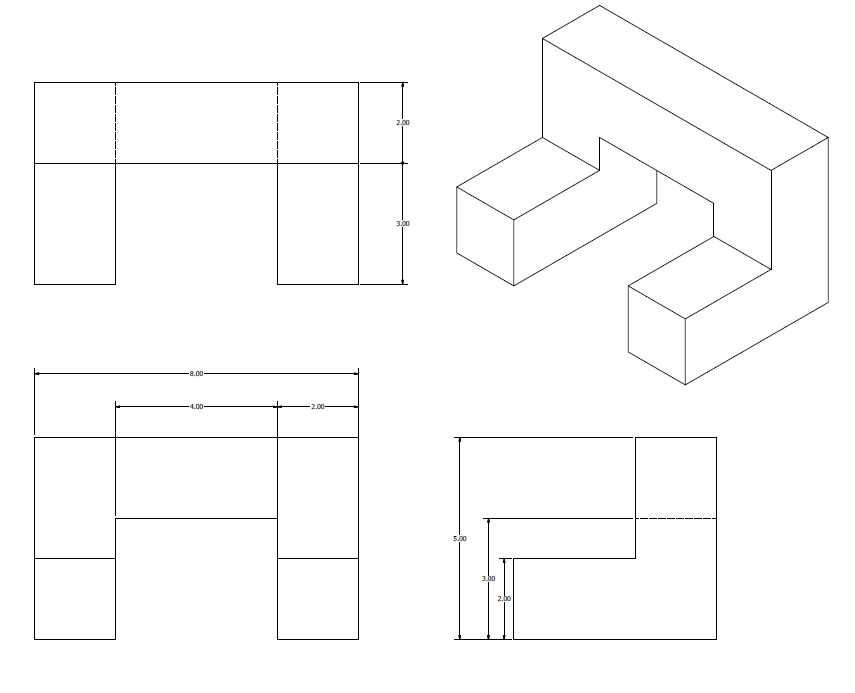
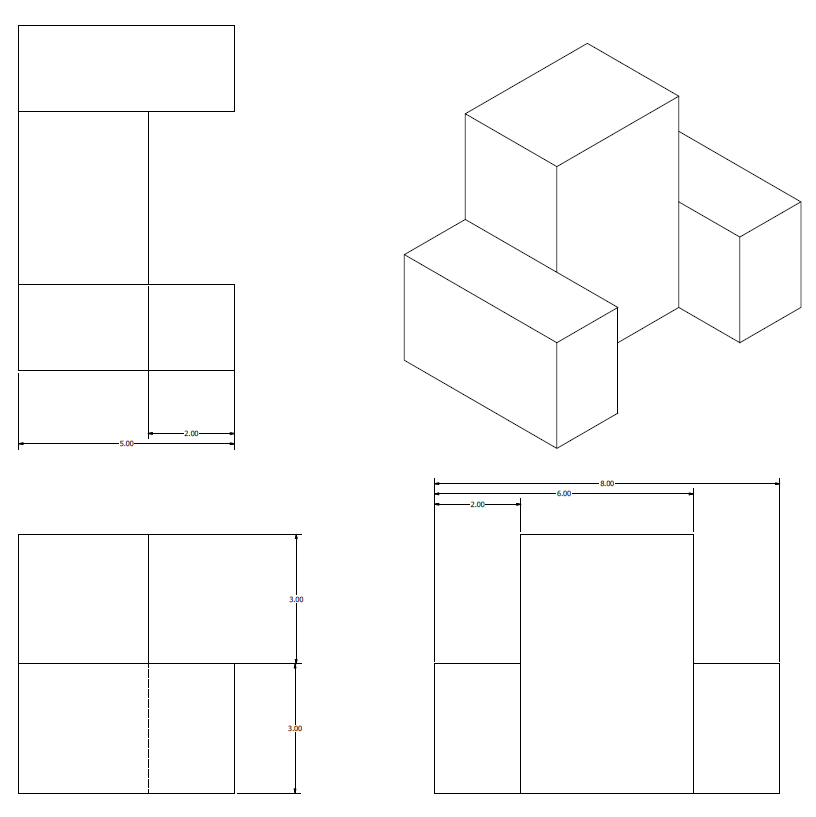
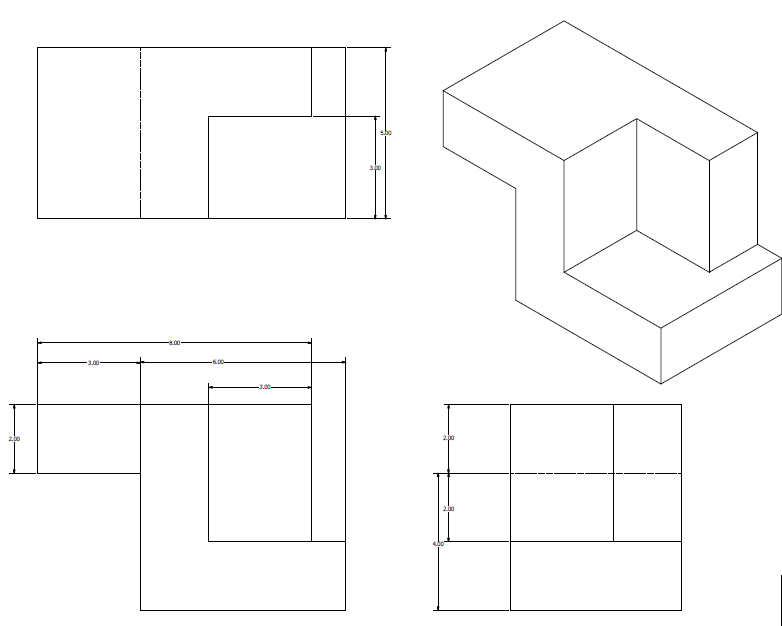
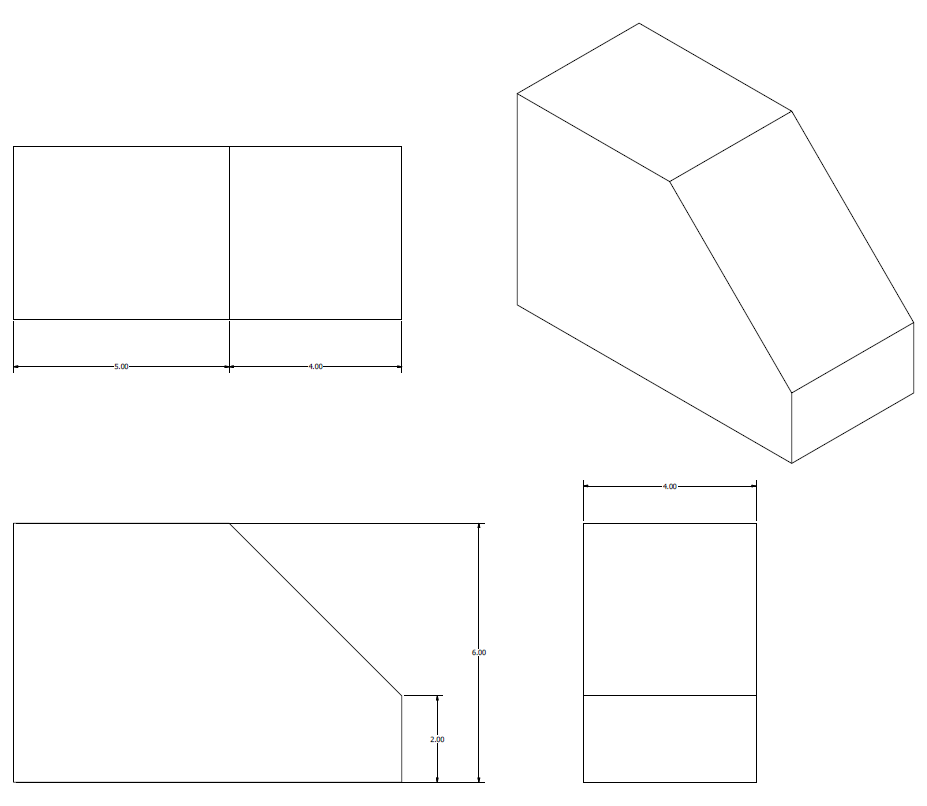
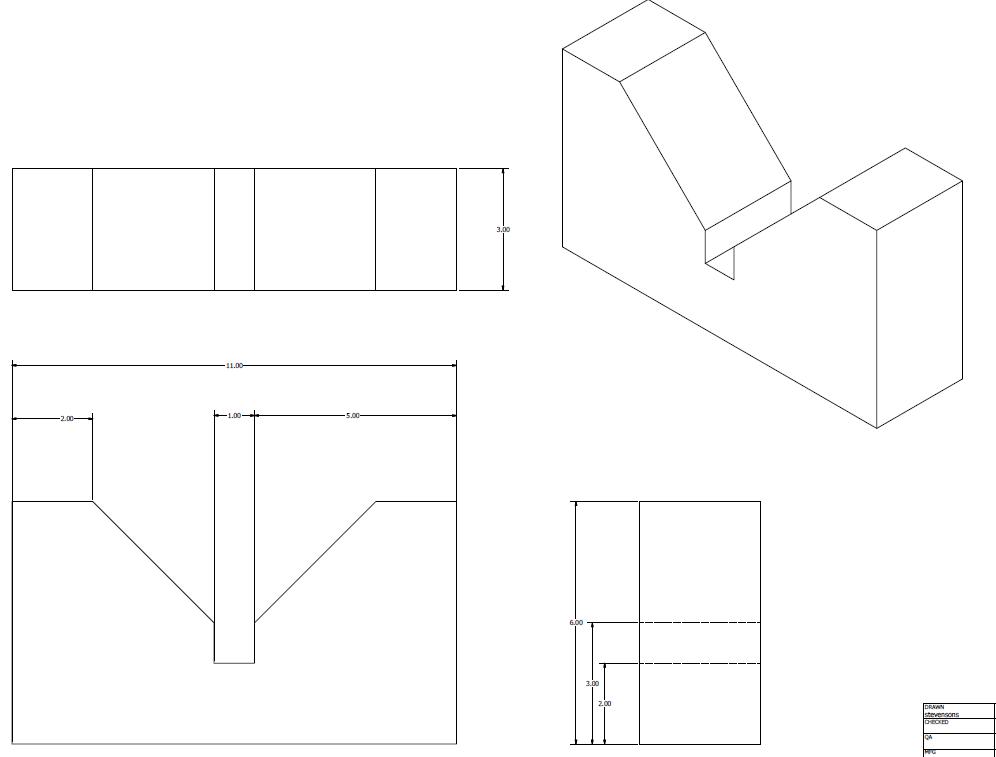
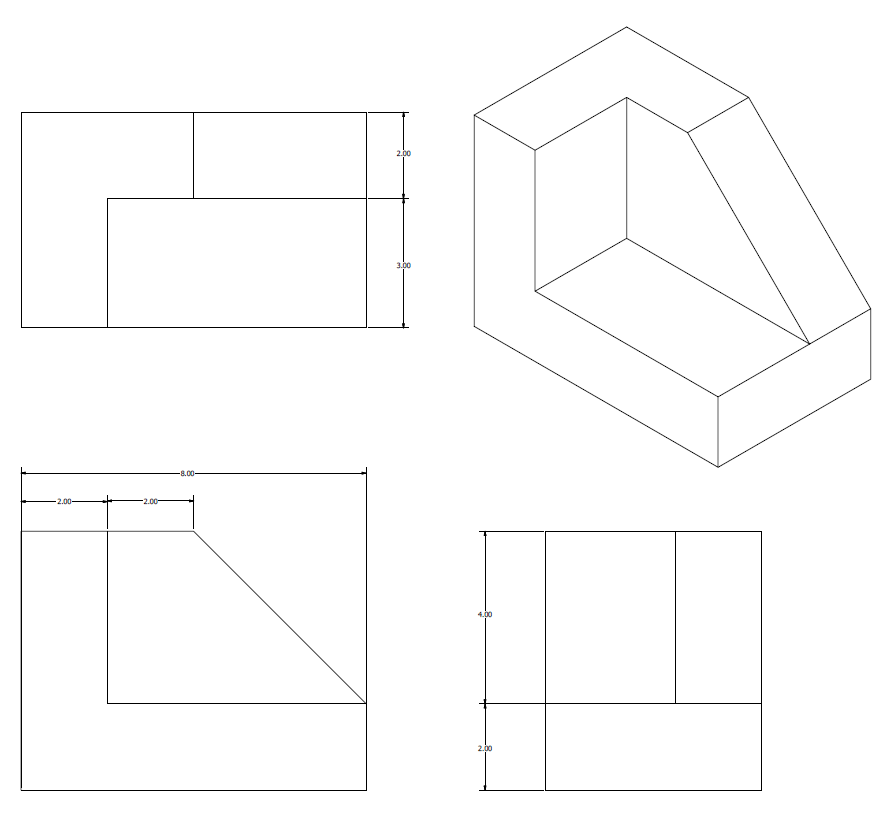
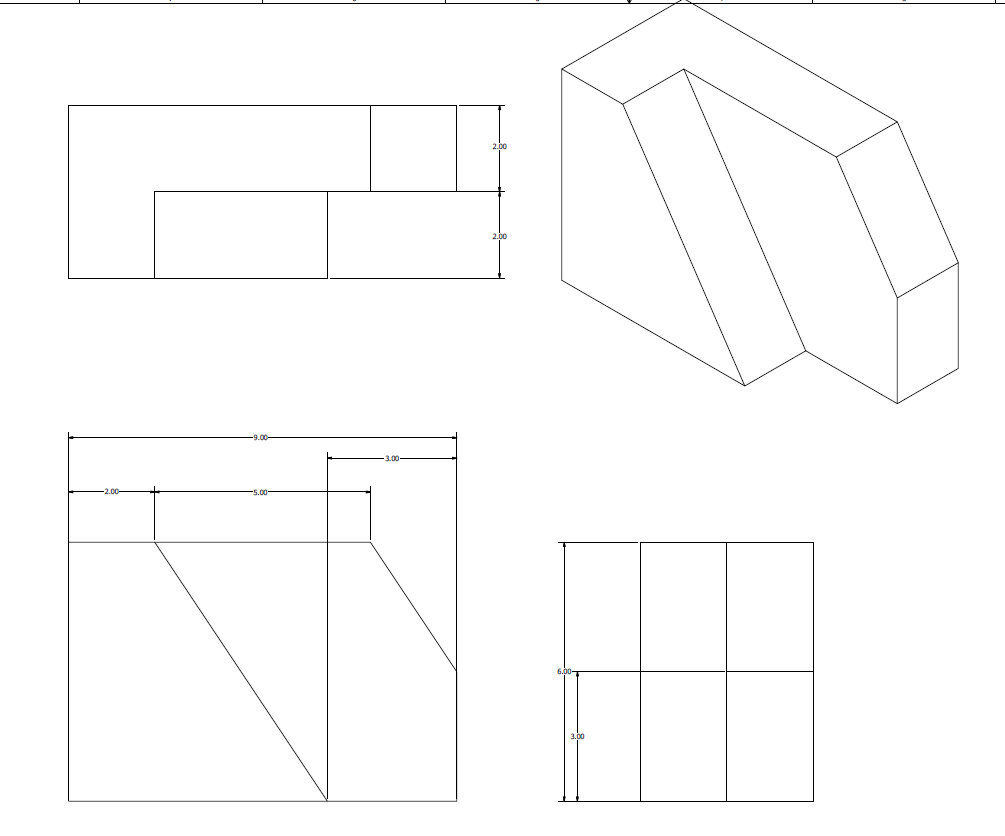
Individually, build the shapes on this page. Each model has a blueprint, as well as a short video showing the "best" view to sketch as well as the directions used for extrusion.
Model 1
|
|
Model 2
|
|
Model 3
|
|
Model 4
|
|
Model 5
|
|

Model 6
|
|
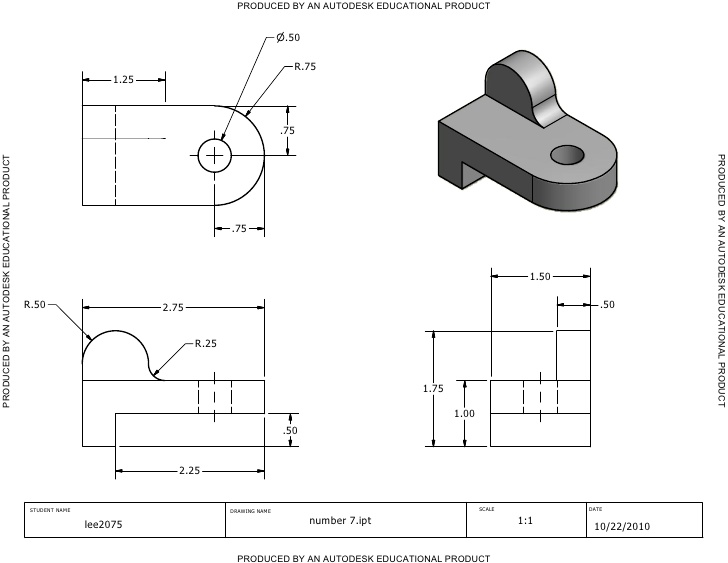
Model 7
|
|
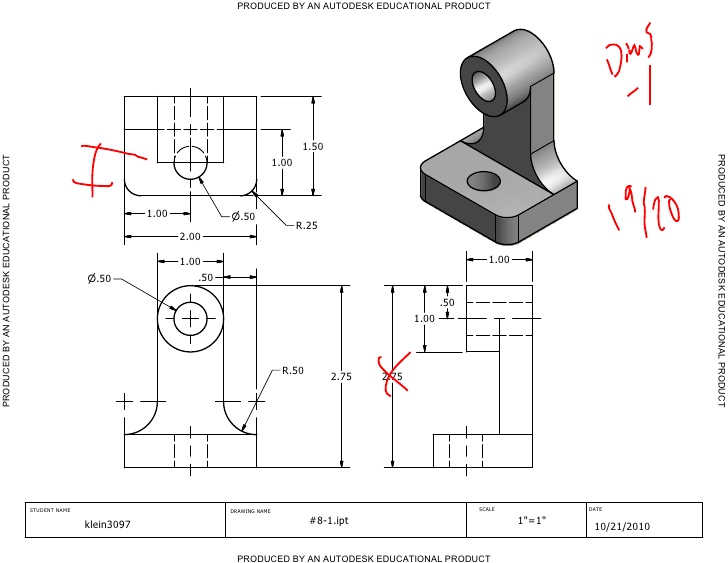
Model 8
|
|
Model 9
|
|
Model 10
|
|
Model 11
|
|
Model 12
|
|
Practice 13-16
Now that you've done that, let's practice with some curves, also. For each image, you'll need to decide which is the simplest shape to start with, and then extrude and cut from there. Each image will require using a curve or arc. If a measurement indicates "R", it is giving the radius. If it have a symbol of a circle with a line through it, it is giving the diameter. Some features can be made with either extrusion cuts or by using the chamfer or fillet tools. There is no wrong way to make them, as long as you have the right shape and measurements.
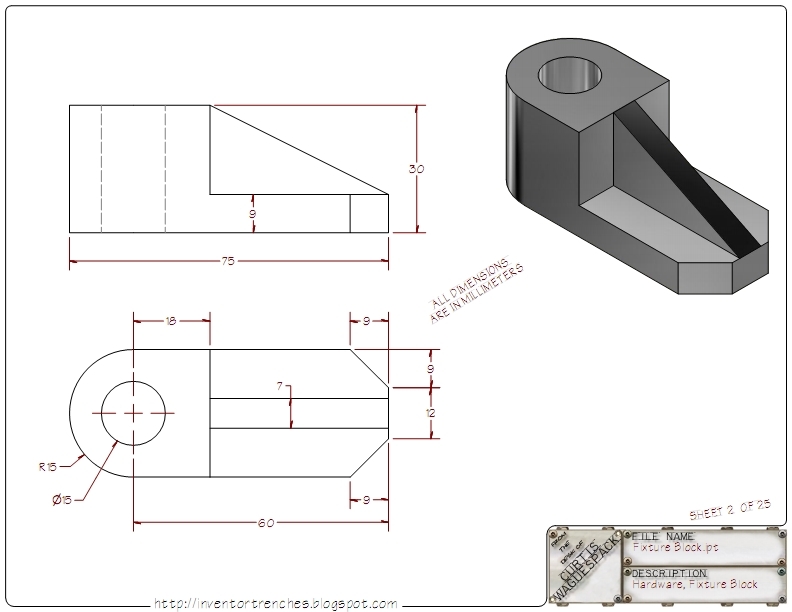
This next part is fairly simple. It is made entirely of straight lines...but it has some weird angles. To replicate this figure, you'll have to use the Loft Tool. You may need to do some research on the interwebs, and/or watch the demo video. (This is optional.)