Last Lesson
In our last lesson, we learned how to fix simple shapes so they can be extruded, as well as how to make invisible shapes visible. In this lesson, we will learn some basic ways to manipulate and connect basic lines and points.
Evaluation
You will be evaluated for this lesson based on the quality of your notes, your group discussions, and by demonstrating your ability to use constraints to modify shapes in a provided sketch.
Demonstration
Create a section for this lesson in your Notebook. Be sure to take detailed notes as you watch this video on the important elements of how to use the constraint tools. When done, open inventor and try to make shapes and then constrain them before we move on. Use teh document below to focus your note topics.
If you finish early, try to do one of the "together" practice instructions using the provided file, but use the file and instructions that are NOT for your seat number.
We Discuss
Lets move on into a Stand Up Hands Up Pair Up. Once we've found a partner, we will be doing a TIMED Pair Share. Each partner will have 30 seconds to share what the video was about, what the tools do, and give an example of when it could be used.
You Do Together
Now, you and your shoulder partner will work together to use these tools. You will work simultaneously, agreeing on how to accomplish each step before individually doing so in your copy of inventor. After each step, you should verify that you both did it properly before moving on.
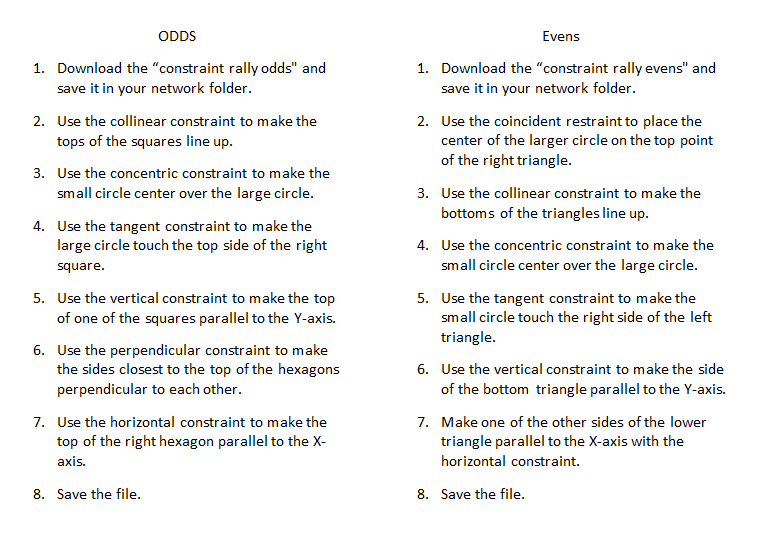
|
| ||||
You Do It Alone
Now, follow the directions below while working alone.
- Download the file below.
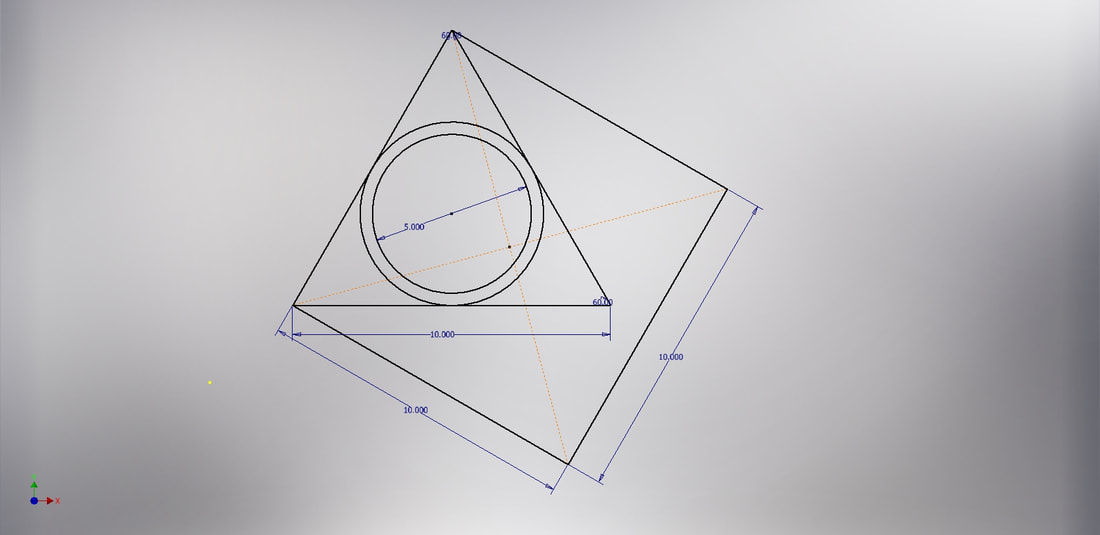
- Constrain the circle inside the triangle to be tangent to each side of the triangle. (If the circle doesn't have a particular size, it will grow of shrink so it can exactly touch each side at one spot.)
- Constrain a side of the square parallel to the left side of the triangle.
- Constrain the left side of the square to be collinear to the left side of the triangle.
- Constrain the lower left corner of the square to be coincident with the lower left corner of the triangle.
- Take the 5 inch diameter circle and apply a Concentric constraint to center it in the other circle.
- Verify it resembles the image below on the left.
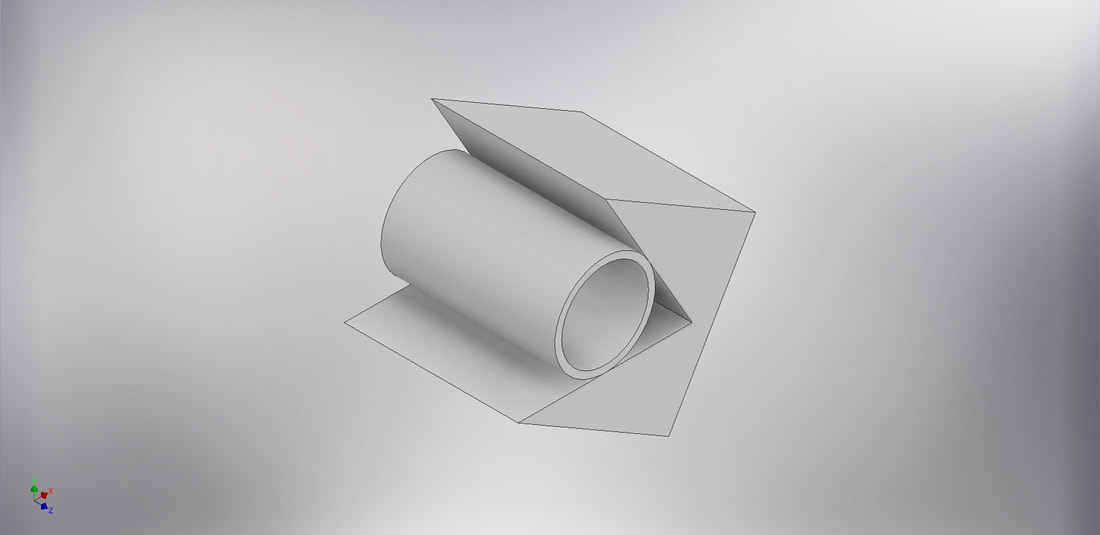
- Finish sketch and extrude it 10 inches to match the image on the lower right. (If you cannot extrude, try close loop or deleting and rebuilding lines.)
- Save into your network PLTW folder as "constraint alone practice".
| you_alone_constraints.ipt |
|
|
You Reflect
Read this reflection prompt, and then return to today's blog post under "Today's Design and Modeling Plan" to leave your response as a comment. Then, return and work on some of the extension activities (below this section.)
- Indicate your comfort level with these tools, where 1 is you feel you need substantially more practice, 2 is you feel comfortable but are not an expert, and 3 is you could instruct someone else in how to use these tools.
- Explain which you think is better: to freehand a shape and fine tune it with dimensions and constraints, or to build it with those initial constraints built in?
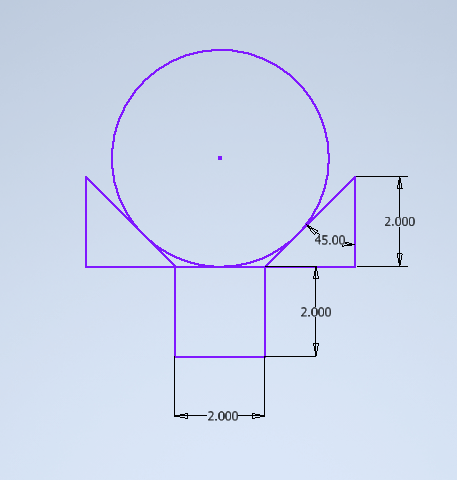
Extensions
- Recreate the shape in the screenshot below using dimensions and constraints. If you have done it correctly, you should be able to click and drag it as a single shape, where it does not come apart when moved.
- Create a group of shapes, and then use ALL of the available constraints to connect them into a whole that can be extruded.
- Watch the troubleshooting video for constraints (below.)